Free Shipping on all items
Welcome to ORO-Z!

Blog posts of '2025' 'April'

RSS
Storage Tips to Prevent Tarnishing and Scratches on Your Jewelry

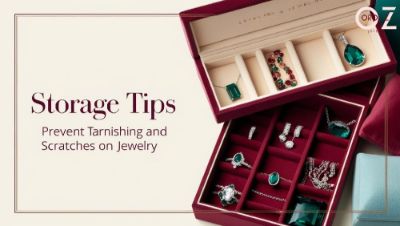
Your jewelry is more than just an accessory — it's an investment, a memory, and often a cherished gift. But over time, even the most beautiful pieces can lose their shine or get scratched if not stored properly. Whether it's a delicate gold chain, sterling silver ring, or a statement earring, the way you store your jewelry directly impacts its condition and lifespan.

Here are smart, practical tips to keep your jewelry looking radiant for years to come:


1. Store Pieces Separately to Avoid Scratches

Jewelry, especially metals and gemstones, can scratch one another when kept together. Avoid tossing multiple items into the same drawer or pouch.

  • Use individual compartments in a jewelry box.

  • Soft fabric-lined trays or pouches are ideal.

  • For chains, use hooks or padded slots to prevent tangling.


2. Keep Silver in Anti-Tarnish Cloth or Bags

Silver jewelry is especially prone to tarnishing due to oxidation. Protect it with:

  • Anti-tarnish cloth wraps or zip-lock bags with anti-tarnish strips.

  • Silica gel packets in your jewelry box to absorb moisture.

  • Avoid storing silver with rubber bands, newspaper, or materials that emit sulfur.


3. Avoid Humid or Direct Sunlight Areas

Moisture is a major enemy of fine jewelry. Humid environments (like bathrooms) accelerate tarnishing and discoloration.

  • Keep your jewelry in a cool, dry place.

  • Use a dehumidifier if necessary.

  • Avoid prolonged exposure to direct sunlight which can fade or weaken materials over time.


4. Clean Before You Store

Storing dirty or sweaty jewelry can trap oils, perfumes, and skin residue — all of which can lead to corrosion or dullness.

  • Wipe your jewelry with a soft, lint-free cloth before putting it away.

  • Make regular cleaning part of your routine — especially after wearing lotions, makeup, or perfume.


5. Use Travel Cases for On-the-Go Protection

When traveling, throwaway pouches or wrapping items in tissue isn’t enough.

  • Invest in a compact jewelry travel organizer with secure slots and padding.

  • For delicate items, wrap them individually in microfiber cloths.


6. Rotate Your Jewelry

Just like your wardrobe, your jewelry needs rotation. Constantly wearing the same piece can wear it down, while others may tarnish from neglect.

  • Use less-frequented pieces occasionally to maintain their condition.

  • Give often-worn jewelry a rest to inspect for wear and tear.


Final Thought

Proper jewelry storage isn’t complicated — it just takes a bit of consistency and care. A little effort goes a long way in keeping your pieces sparkling, scratch-free, and ready to shine every time you wear them.

Because when jewelry is stored with love, it lasts a lifetime.

A Beginner’s Guide to Diamond Cuts and Clarity

When you're shopping for a diamond—whether it's for an engagement ring, a gift, or a treat-yourself moment—you'll quickly run into two important terms: cut and clarity. These are part of the famous 4Cs (Cut, Clarity, Color, and Carat), and they play a major role in a diamond's beauty and value.

Let’s break them down in a way that’s easy to understand.


What is Diamond Cut?

Contrary to what it sounds like, cut doesn’t refer to the shape of a diamond (like round, oval, or princess). Instead, it’s all about how well the diamond has been crafted and faceted. A well-cut diamond reflects light beautifully, making it sparkle and shine.

Grades of Diamond Cut:

  • Excellent – Maximum sparkle and brilliance

  • Very Good – Great sparkle, slightly less than excellent

  • Good – Adequate light reflection, more affordable

  • Fair/Poor – Dull appearance due to poor light performance

Fun Fact: A diamond with a higher cut grade can often look more impressive than one with a bigger carat size!


🔍 What is Diamond Clarity?

Clarity measures how “clean” a diamond is, based on internal and external imperfections. These imperfections are called inclusions (inside) and blemishes (outside). Most are so tiny you’d never see them without magnification.

Clarity Grades:

  • FL/IF (Flawless/Internally Flawless): No visible inclusions

  • VVS1 & VVS2 (Very Very Slightly Included): Extremely hard to see even under 10x magnification

  • VS1 & VS2 (Very Slightly Included): Minor inclusions, invisible to the naked eye

  • SI1 & SI2 (Slightly Included): Visible under magnification, some may be seen without it

  • I1, I2 & I3 (Included): Obvious inclusions, may affect durability

Tip: For a good balance of quality and value, many buyers go for VS1 or SI1 clarity. These often appear flawless to the eye but cost less.


💡 Why Cut and Clarity Matter

A beautifully cut diamond with good clarity will sparkle brighter and last longer. But it’s all about what matters most to you—some people prioritize size or color, while others want flawless brilliance.


🛍️ Quick Buying Tips for Beginners:

  • Don’t obsess over getting the highest clarity—eye-clean diamonds look just as stunning.

  • Always prioritize cut. A well-cut diamond will shine brighter, even if it's smaller.

  • Ask for certification (like GIA or AGS) when buying to confirm the quality grades.


💬 Final Thoughts

Understanding diamond cut and clarity is the first step to making a confident, informed purchase. Whether you’re shopping for someone special or simply learning the ropes, knowing how these features affect a diamond's sparkle, beauty, and price puts you ahead of the game.

The Meaning Behind Popular Gemstones: Symbolism & Significance

Jewelry has always been more than just decoration — it’s a way to express personality, tell stories, and carry meaning. One of the most powerful ways this shows up is through gemstones. These beautiful stones have been treasured for centuries not just for their beauty, but for the symbolism and energy they represent.

Whether you're shopping for a meaningful gift or simply want to understand the deeper value of the gems you wear, here's a guide to the meanings behind some of the most popular gemstones.


💙 Sapphire – Wisdom & Loyalty

Sapphires have long been associated with wisdom, truth, and loyalty. In ancient times, kings and queens wore sapphire jewelry to protect them from harm and bring clarity of thought. Today, it’s also a symbol of faithfulness, making it a popular choice for engagement rings and romantic gifts.


❤️ Ruby – Passion & Courage

Rubies are fiery and bold — the gemstone of passion. Historically, they’ve been thought to promote vitality, confidence, and courage. They’re also linked with love and powerful emotional energy, making them perfect for anyone going through transformation or chasing bold goals.


💚 Emerald – Love & Growth

The vibrant green of emerald symbolizes renewal, growth, and harmony. Often called the “stone of successful love,” emeralds are said to promote emotional balance and open the heart. They’re great for celebrating relationships, personal healing, and new beginnings.


💎 Diamond – Strength & Purity

Beyond being the ultimate symbol of everlasting love, diamonds represent clarity, strength, and invincibility. They're believed to amplify energy and bring balance to the wearer. Their long-lasting brilliance is why they’re the go-to stone for major milestones.


💜 Amethyst – Peace & Protection

Amethyst has been prized for centuries as a protective stone. It’s thought to bring calm, reduce stress, and encourage spiritual growth. This soothing purple gem is often used in meditation and is perfect for anyone seeking balance and inner peace.


🖤 Onyx – Grounding & Resilience

With its deep, dark appearance, onyx is a grounding stone believed to absorb negative energy and promote emotional strength. It’s often worn during challenging times to encourage resilience and protect against emotional drain.


💛 Citrine – Joy & Abundance

Bright and sunny, citrine symbolizes joy, energy, and abundance. It’s often called the “success stone” and is believed to attract wealth and positive energy. A great choice for boosting confidence and motivation.


🌈 Final Thoughts

Whether you're drawn to a gemstone for its look or its meaning, wearing it can be a powerful way to express your intentions and emotions. From calming amethyst to energizing citrine, each gem holds its own unique story — and adds a deeper layer of connection to the jewelry you wear.

So the next time you slip on your favorite piece, ask yourself: what does this stone say about me?

Stacking Rings: Tips to Mix Metals & Shapes Stylishly

Ring stacking has become more than just a trend—it's a personal art form. Whether you’re drawn to dainty gold bands or chunky gemstone rings, learning how to layer them harmoniously can elevate your entire look. In this guide, we’ll share how to stack rings like a pro, blending metals, shapes, and styles in ways that feel both intentional and effortlessly chic.


🔸 1. Start With a Focal Piece

Begin your stack with a statement ring. This could be a signet ring, a gemstone piece, or anything bold that anchors your look. Once you have a hero piece, it becomes easier to build around it with complementary styles.


🔸 2. Mix Metals With Confidence

Gone are the days of sticking to just gold or silver. Mixing metals—think rose gold with white gold, or silver with yellow gold—adds dimension and modernity. Keep balance in mind: pair warm tones with cool ones and consider one metal as the “base” tone.

Style Tip: Choose one dominant metal and add a pop of contrast with a different tone for visual interest.


🔸 3. Play With Shapes and Textures

Combine smooth bands with twisted or hammered textures. Mix clean geometric shapes with organic, free-form styles. The contrast between different ring designs adds depth and personality to your stack.


🔸 4. Balance Thickness and Proportion

Avoid overwhelming your fingers by mixing thin and thick bands evenly across your hand. Too many chunky rings on one finger can feel heavy, while an all-dainty stack might lack impact. Think of it like styling layers in fashion—varying sizes makes it visually engaging.


🔸 5. Don't Forget Negative Space

Let your fingers breathe! Stacking doesn’t mean covering every inch of your finger. Leave a finger bare or use midi rings to create visual spacing in your design.


🔸 6. Keep It Personal

Incorporate rings that hold meaning—birthstones, initials, heirlooms, or zodiac signs. A ring stack should tell your story, not just follow a trend.


🔸 7. Switch It Up With Seasons or Moods

Stacking is one of the most versatile styling techniques. You can change your rings to match your outfit, mood, or season. Go minimalist for work, bold for a night out, and boho for summer vibes.


🔸 Final Thoughts

Ring stacking is all about self-expression and experimentation. There are no hard rules—just helpful guidelines. So whether you’re building a new stack or refreshing an old one, trust your instincts, have fun with the process, and wear it with confidence.

How to Layer Necklaces Like a Pro: 8 Essential Tips

Layered necklaces are the ultimate accessory move—effortless, stylish, and full of personality. But layering isn’t just about throwing on a few chains. With the right balance and technique, you can create a look that’s polished, intentional, and 100% you. Here's how to master it in 8 simple steps:


✨ 1. Vary Your Lengths

To avoid a tangled mess and give each necklace its own space, choose pieces in different lengths. Think short, mid, and long layers.

  • Choker: 14–16"

  • Princess: 18"

  • Matinee: 20–24"

  • Opera: 28”+

🔹 Pro Tip: Start with your shortest chain and layer down.


✨ 2. Mix Chain Styles

Don’t be afraid to combine different chain textures—fine chains, bold links, beaded strands, or rope styles. Mixing textures adds depth and interest.

Try This:

  • Paperclip chain + pearl strand

  • Herringbone + coin pendant

  • Dainty chain + chunky curb link


✨ 3. Include a Statement Piece

Anchor your look with one standout piece. It could be a pendant, charm, gemstone, or personalized design that draws attention.

🔹 Pro Tip: Make this your longest or middle layer to keep your look balanced.


✨ 4. Stick to a Color Story

Keep your metals or tones cohesive—whether you’re team gold, silver, or rose gold. You can mix metals, but do it with intention.

Bonus Tip: If mixing metals, repeat each one at least twice for a more curated look.


✨ 5. Add a Pop of Personality

Throw in something unique to you—a birthstone, a locket, an engraved tag, or a vintage piece. Personal touches make your layers feel more meaningful.


✨ 6. Match Your Neckline

Choose necklaces that complement your neckline for a seamless look.

  • V-neck: Layer in a V or Y-shape

  • Scoop neck: Try multi-lengths

  • Turtleneck: Go for long, bold pendants

  • Off-the-shoulder: Let a choker or collar shine


✨ 7. Use Layering Tools

Avoid the frustration of tangled chains by using a necklace layering clasp or multi-strand connector. They’ll keep everything in place.


✨ 8. Know When to Stop

Less is more. For everyday wear, 2 to 4 necklaces are usually the sweet spot. If your outfit is bold, keep your jewelry simple.


💎 Final Thoughts

Layering necklaces is about creativity, balance, and a little trial and error. With these 8 tips, you’ll be stacking like a pro in no time—whether you’re dressing up a tee or finishing off a night-out look.